The TL;DR Guide

Assembly

Harvesting
Table of contents:
Setting Up the Sprout Spout
Installing the Stainless Steel Screen
Securing the Sprout Spout
Depositing Soaked Seeds
Standard Watering Schedule
Contrarian Advice: Extra Rinse on Day 1-2
Watching for Condensation
"Break the Cake" Technique
Adjusting for Humidity Levels
Light Exposure & Photosynthesis
1
Soaking
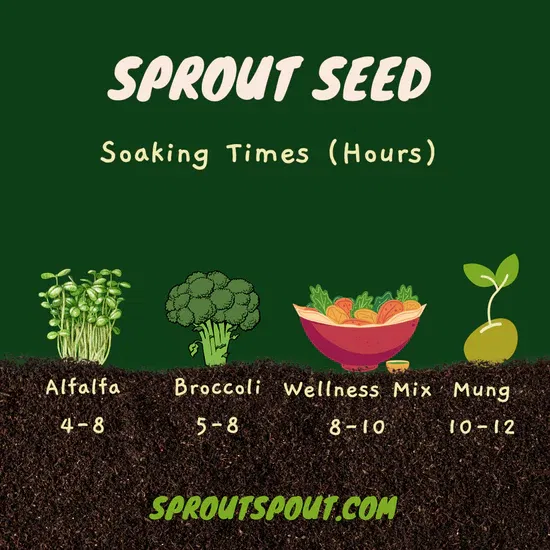
Soaking seeds Is pretty simple but there are a few rules to abide by. If it's a small seed like broccoli or alfalfa, I generally soak them for about 5 to 8 hours. If it's a large seed like mung bean, I soak it for around 12 hours. When you soak your seeds, always put at least 3x the amount of water to seeds as they will grow from water absorption. This is especially important with beans such as mung and garbanzo as they soak up a lot of water. This stage is critical So you want to be sure they get all the water they need during the soaking process. Water is cheap, seeds aren’t, be smart.
2
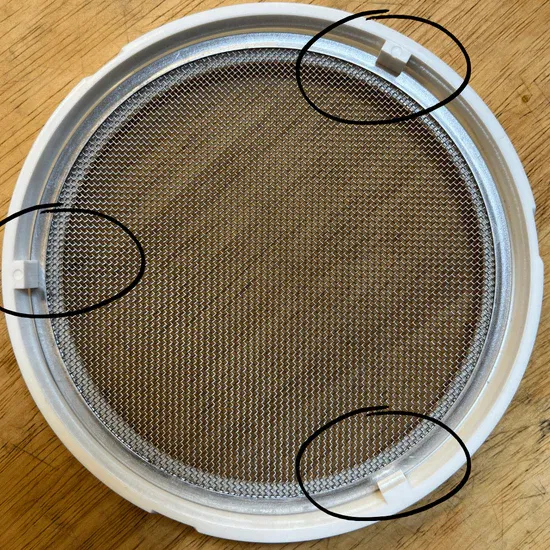
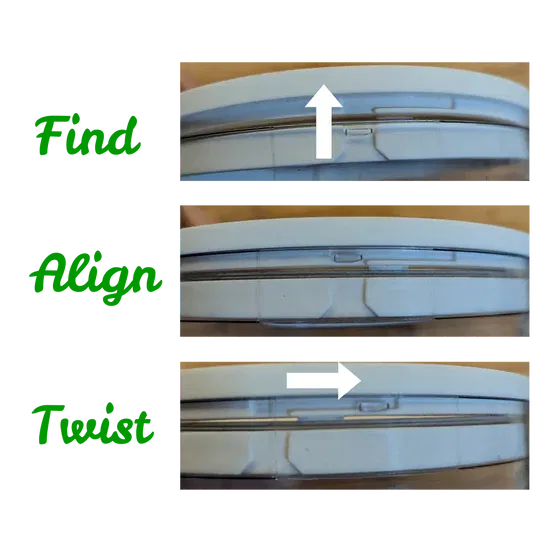
Installing the Stainless Steel Screen
Secure the bottom of the Sprout Spout by aligning the narrow tab and twisting it into place.
3
Securing the Sprout Spout
Insert the Stainless steel screen into the bottom of the sprout spout and ensure that it is centered. On your first use, you may have to pry the side opening just a bit until it slides completely into place. Note: The Screen is centered when all three support tabs have direct contact
4
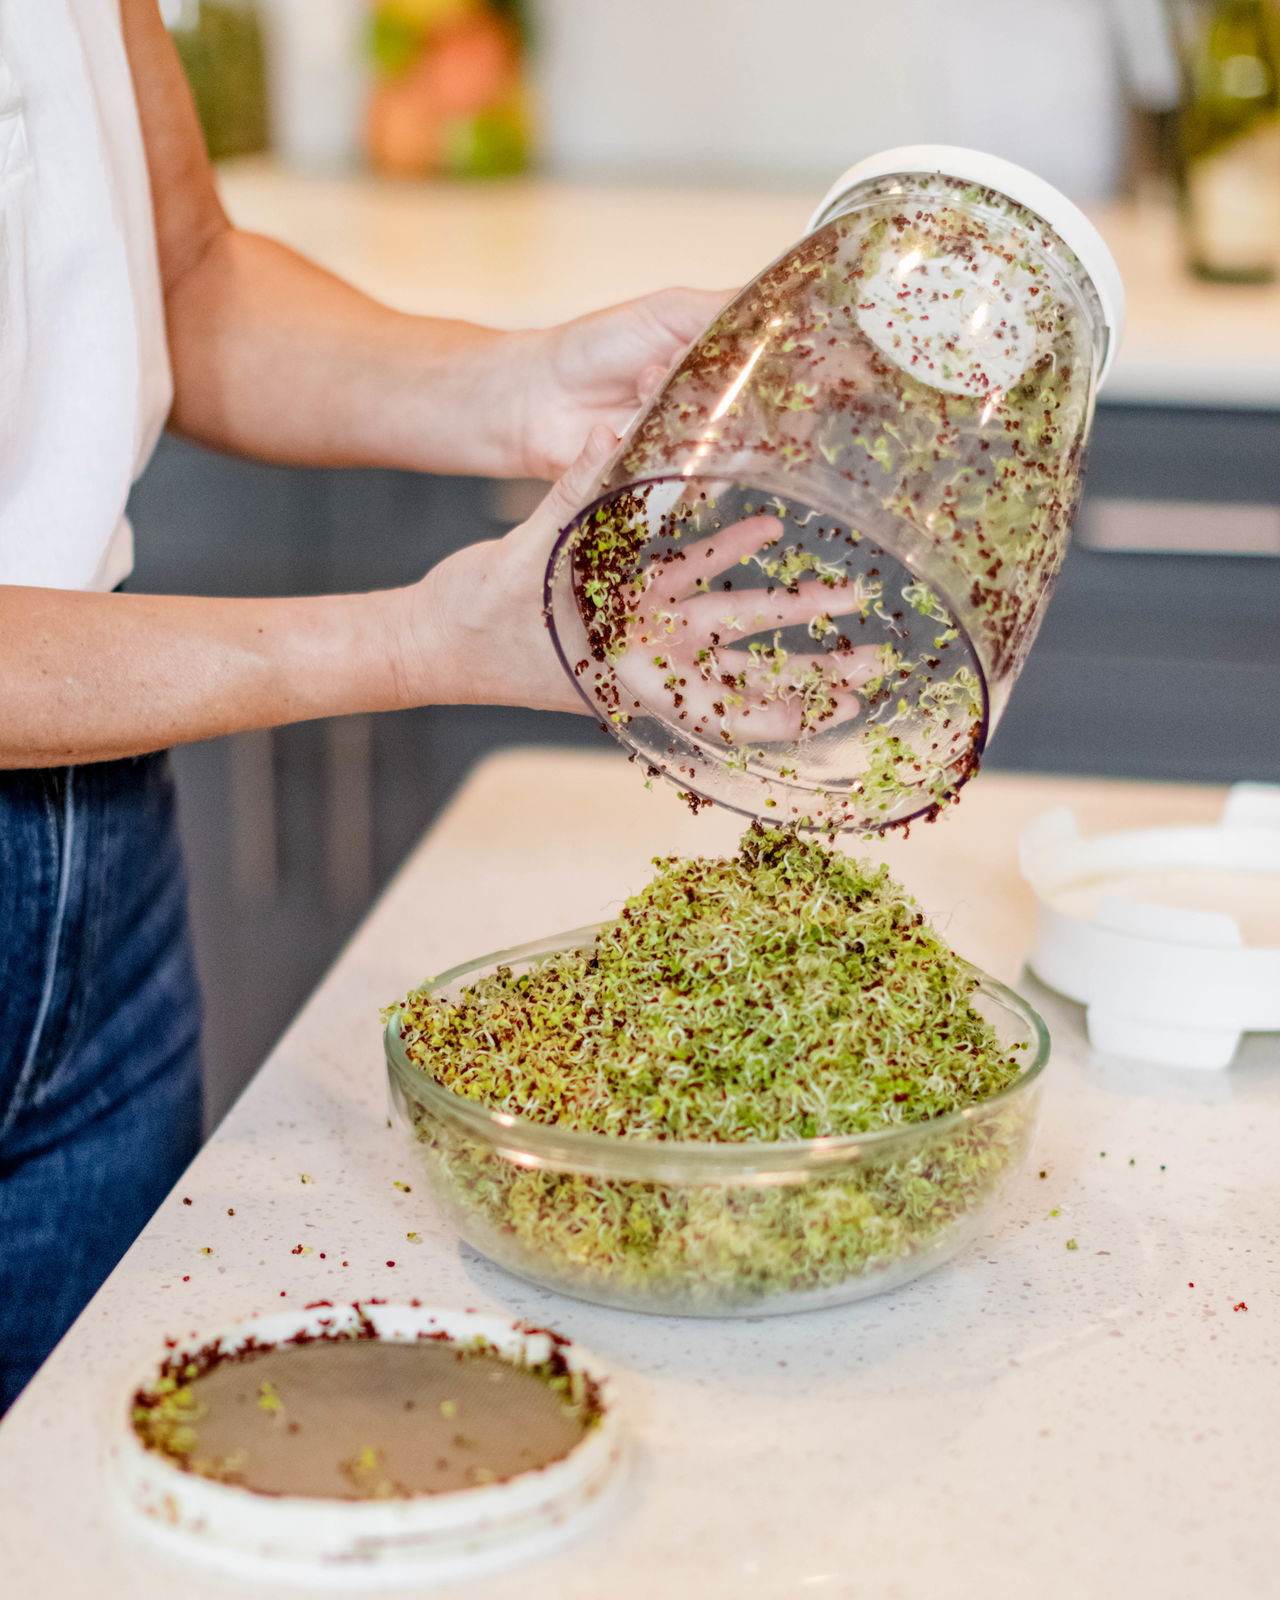
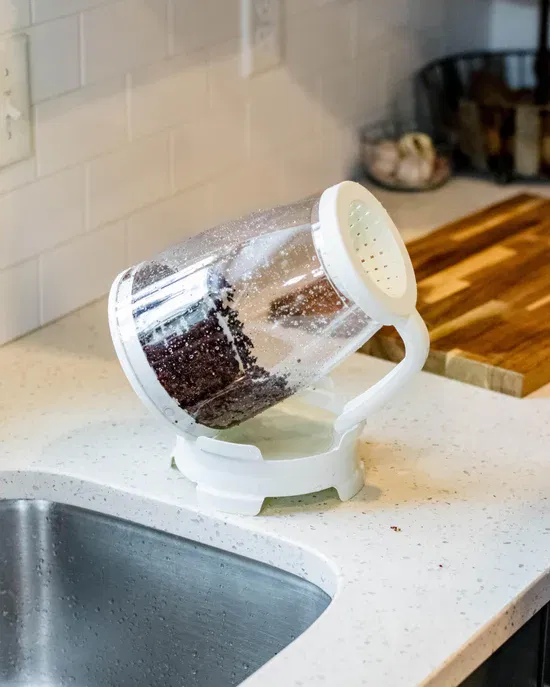
Depositing Soaked Seeds
After your seeds have soaked, strain them by pouring them in through the top of the Sprout Spout and give them a quick rinse. Now attach the top of the Sprout Spout by centering it and gently turning it ‘counterclockwise’ till you hear a slight ‘click’. Then proceed to tighten it by turning it ‘clockwise’. Again, the first use is the trickiest as the threads have more friction on their first use. Congratulations! With your soaked seeds deposited and your top and bottom attached securely you have made past the hardest part of sprouting with the Sprout Spout.
5
Water
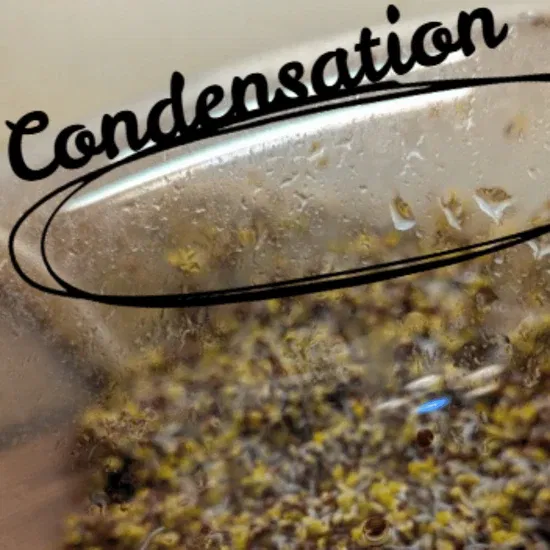
For the first few days, it's pretty safe to rinse your seeds twice a day. Contrarian Advice: It may actually be advantageous to give your seeds and extra ‘midday’ rinse during the first day or two. This is because the water mostly slides off the seeds so it's difficult to have too much moisture in the container at this point. Once you see the tails coming out of the seed (usually day 2-3), keep an eye out for condensation from humidity. If there is condensation you will see droplets of water along the inside of the Sprout Spout. This is an indication that there is enough water for your sprouts to survive. If the droplets are big and release easily (tapping the jar), you don't even need to rinse them. Just give him a shake (which distributes the water inside). Check on them again at your next scheduled rinse time.
6
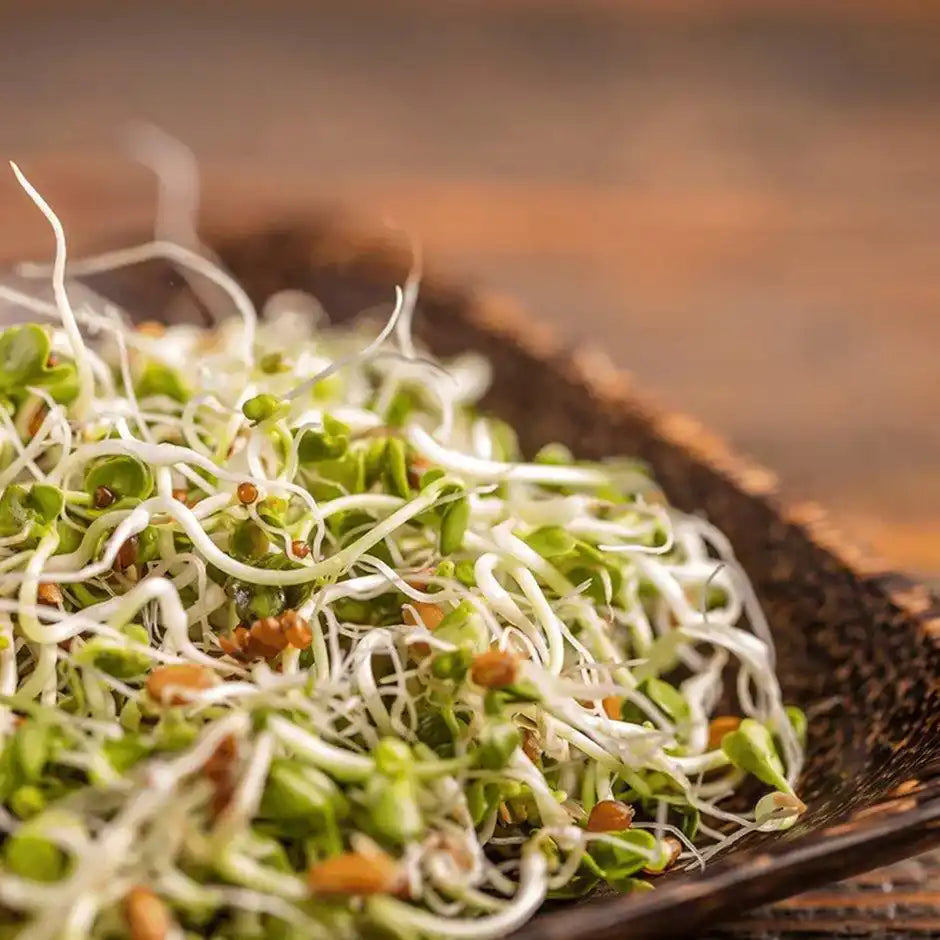
Harvest
Once your sprouts have their desired look and texture, you simply untwist the base of the jar and slide them into a container of your choice. I find a 1 gallon ziploc with a paper towel in it is an excellent solution. It fits completely around the base and there are no dishes to clean. Remember, convenience is key to keeping things in your routine.
Let's Review
Soak time is based on seed size.
Make sure you add plenty of extra water.
Schedule: I generally check my sprouts in the morning, and again in the evening. About 12 hours apart.
Days 1 - 2: If the seeds look dry, It’s ok to water them a third time
Days 2+: If there is humidification in the jar, you don't even need to rinse them.
Just give him a shake (which distributes the water inside) and check on them again at your next scheduled rinse time.
Harvest when your sprouts have emerged from their seeds to the desired size and texture.
The entire principle of the Sprout Spout is to allow airflow to do its job and give the sprouts the opportunity to thrive.
This is the very reason I invented the Sprout Spout.
Quality seeds are not cheap and you deserve every advantage possible on your journey of health.
Congrats on your deep dive learning Lab. Now let’s explore some of the recipes to take advantage of those huge harvests you will be enjoying.